
系統設定|System
A. 角色管理|Role
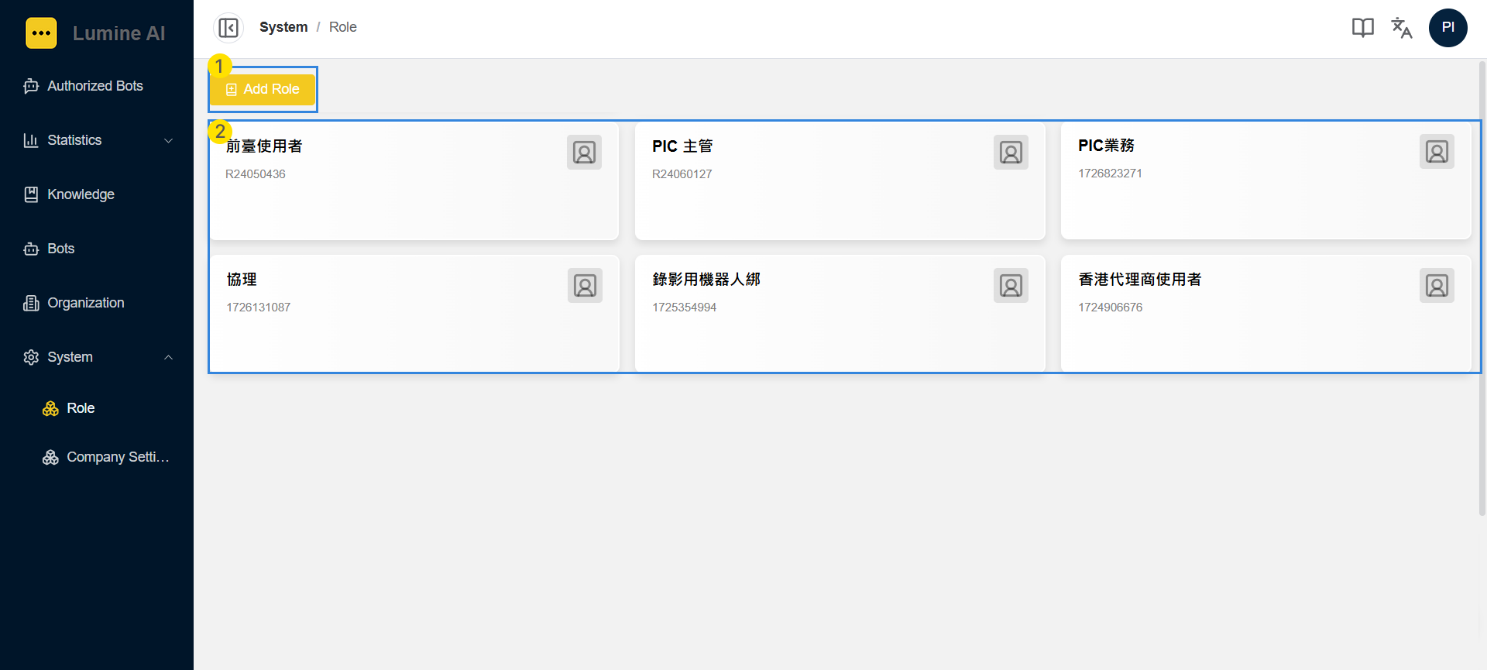
- 新增角色:點擊後可執行建立角色流程;
Add Role: Click to start the role creation process. - 角色列表:顯示已存在的角色,點擊該角色空白處,可編輯角色模組權限;點擊『編輯』按鈕,可編輯該角色名稱;點擊『刪除』按鈕,可刪除該角色。
Role List: Displays the existing roles. Clicking on the blank area of the role allows you to edit the role module permissions. Clicking the “Edit” button allows you to edit the role name, and clicking the “Delete” button allows you to delete the role.
A-1. 建立角色|Creating A Role
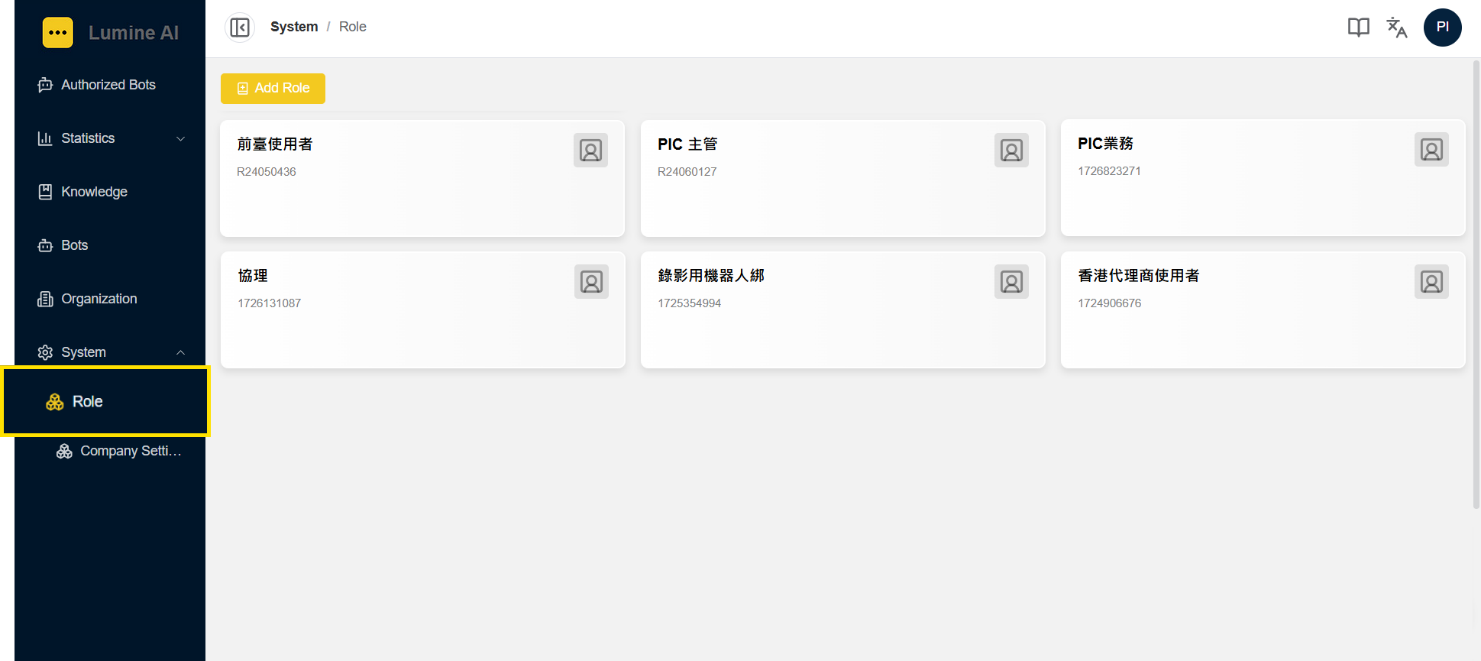
1. 於左側選單點選『角色管理』;
Click “Role” in the left menu.
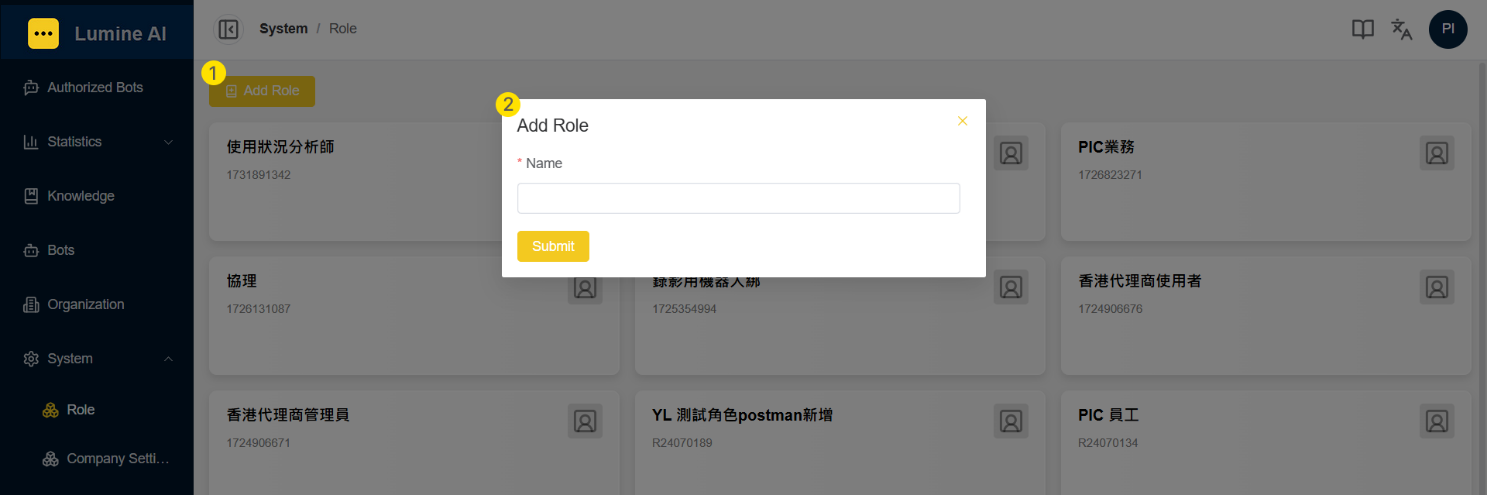
2. 點選①『新增角色』按鈕,並於②新增角色區塊,填寫角色名稱,點擊 『送出』按鈕,完成角色建立。
Click ① the “Add Role” button, and in ② the Add Role section, enter the role name, then click the “Submit” button to complete the role creation.
A-2. 編輯角色模組權限|Editing Module Permission
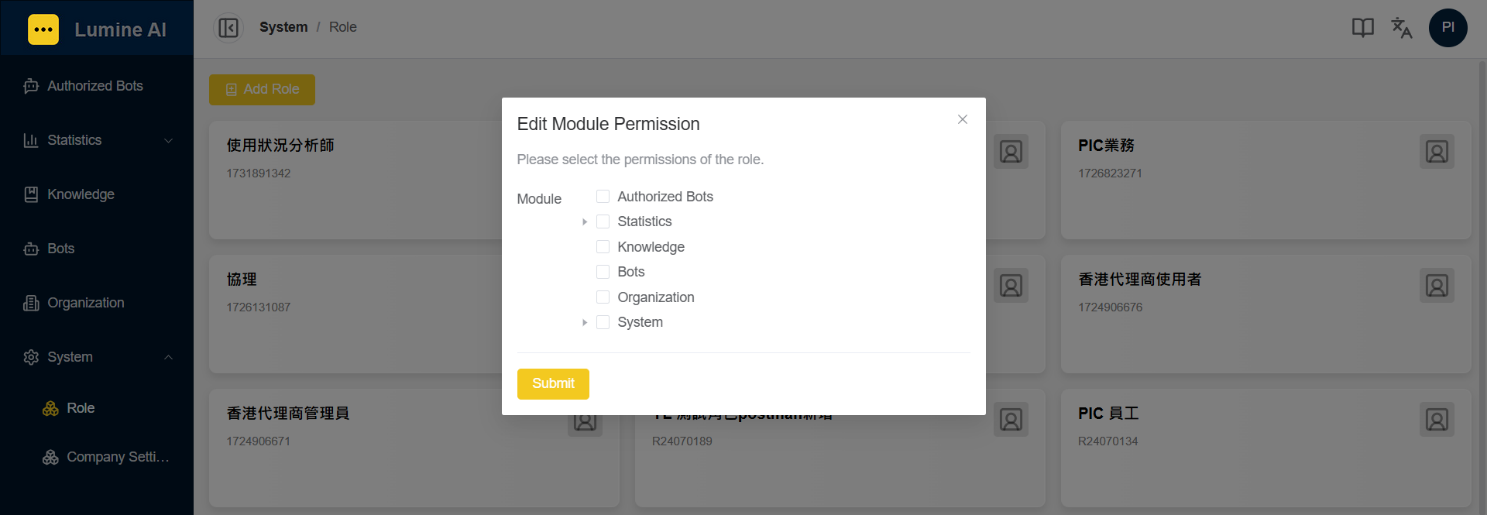
1. 點擊角色區塊空白處,開啟「編輯角色模組權限」視窗;
Click the blank area of the role block to open the pop-up to edit module permissions.
2. 點選該角色可使用的模組權限後,點擊 『送出』按鈕即完成。
Select the role's module permissions, then click “Submit” to complete.
(註)此功能係將角色與功能進行綁定連結,以便設定不同功能的使用權限。例如一般員工僅可使用授權機器人進行對話式問答,僅勾選「授權機器人」即可;行政單位須上傳知識檔案,故建議勾選「授權機器人、知識庫」。
Note: This feature links roles with functions to set different usage permissions. For example, general employees may only use the authorized chatbot for conversational Q&A, so only “Authorized Bots” needs to be selected. Administrative units need to upload knowledge files, so it's recommended to select both “Authorized Bots” and “Knowledge”.
B. 公司設定|Company Setting
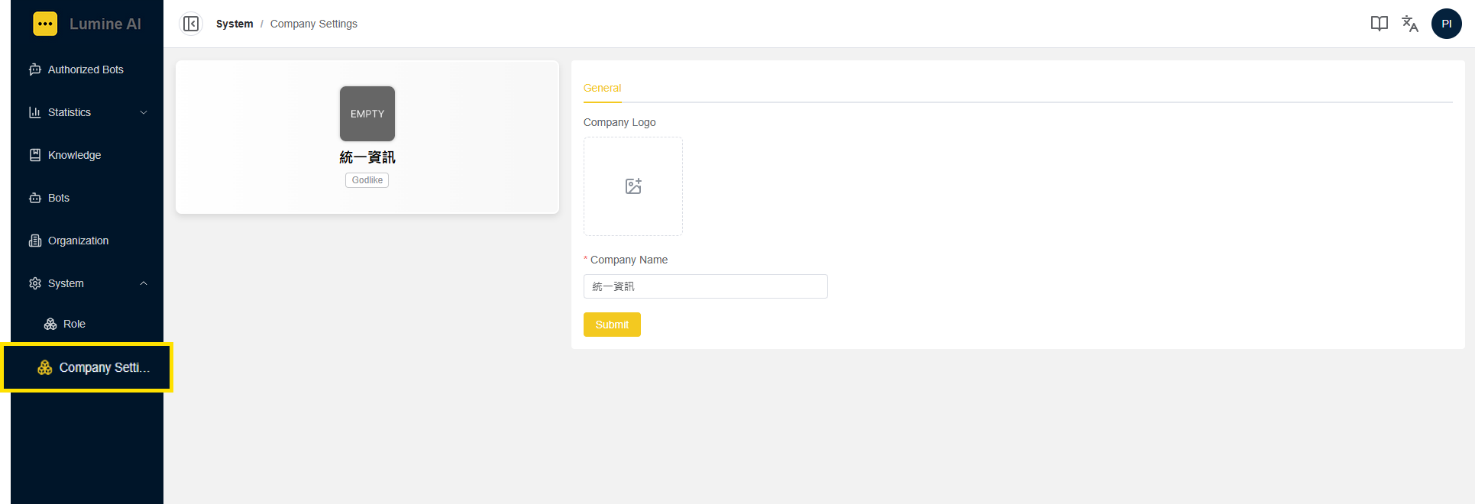
1. 於左側點選「系統 > 公司設定」;
Click “System > Company Settings” in the left menu.
2. 上傳公司 LOGO檔,並填寫公司名稱,點擊『送出』按鈕即完成。
Upload the company logo and enter the company name, then click “Submit” to complete.
C. 企業管理|Organization
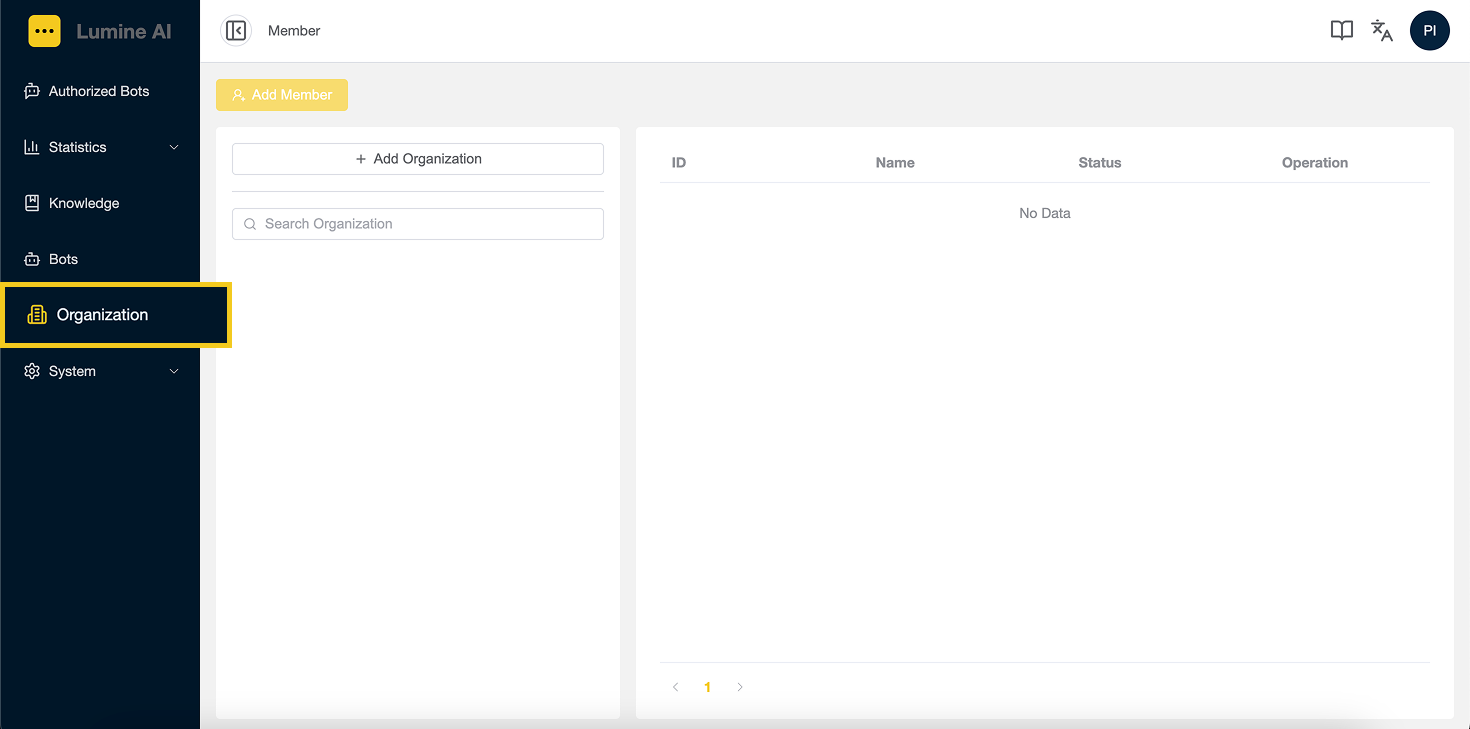
1. 於左側點選「企業管理」。
Click “Organization” in the left menu.
C-1. 企業管理列表|List
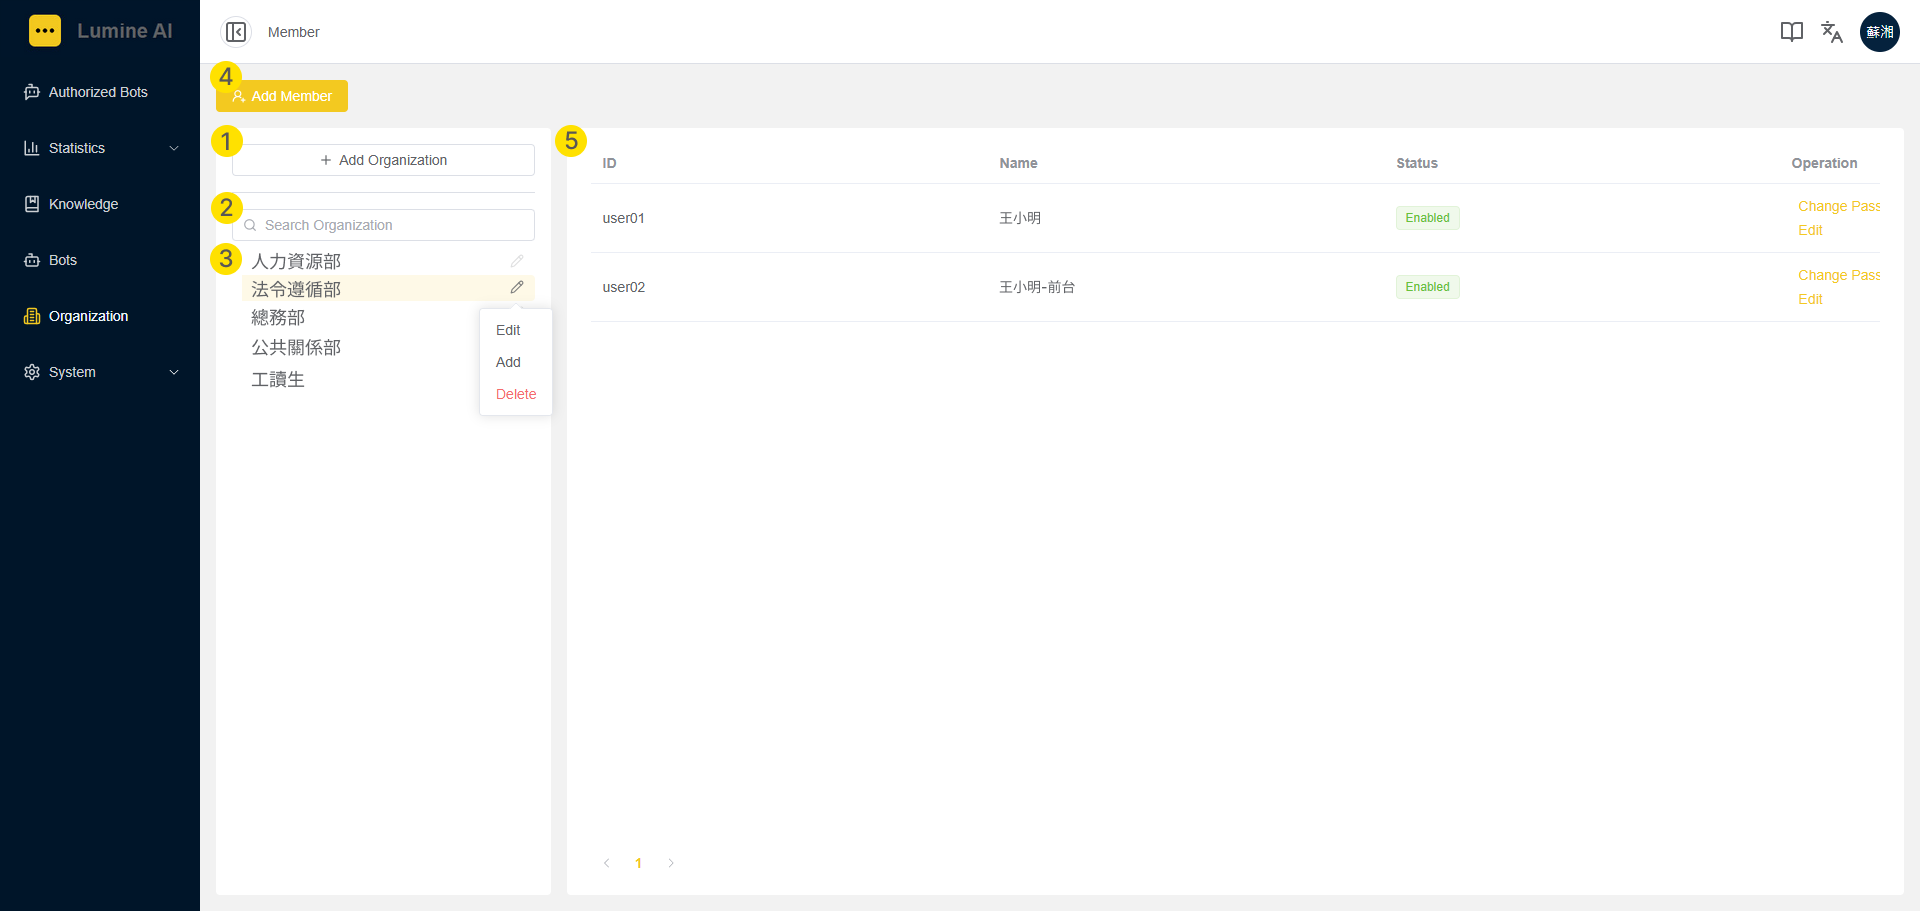
- 新增組織:點擊後可執行新增組織流程;
Add Organization: Click to start the process of adding an organization. - 搜尋:針對組織名稱進行關鍵字搜尋;
Search Bar: Search for an organization by name using keywords. - 組織列表:已存在的組織名稱,點擊後方鉛筆icon,可執行編輯組織名稱、新增子組織、刪除組織;
Organization List: Displays existing organizations. Click the pencil icon to edit the organization name, add a sub-organization, or delete the organization. - 新增組織成員:點擊後後可執行新增成員流程;
Add Member: Click to start the process of adding members. - 組織成員列表:針對區塊➂的組織,顯示各組織內的成員。
Organization Member List: Displays the members within each organization listed in section ➂.
C-2. 新增與編輯組織|Adding & Editing Organization
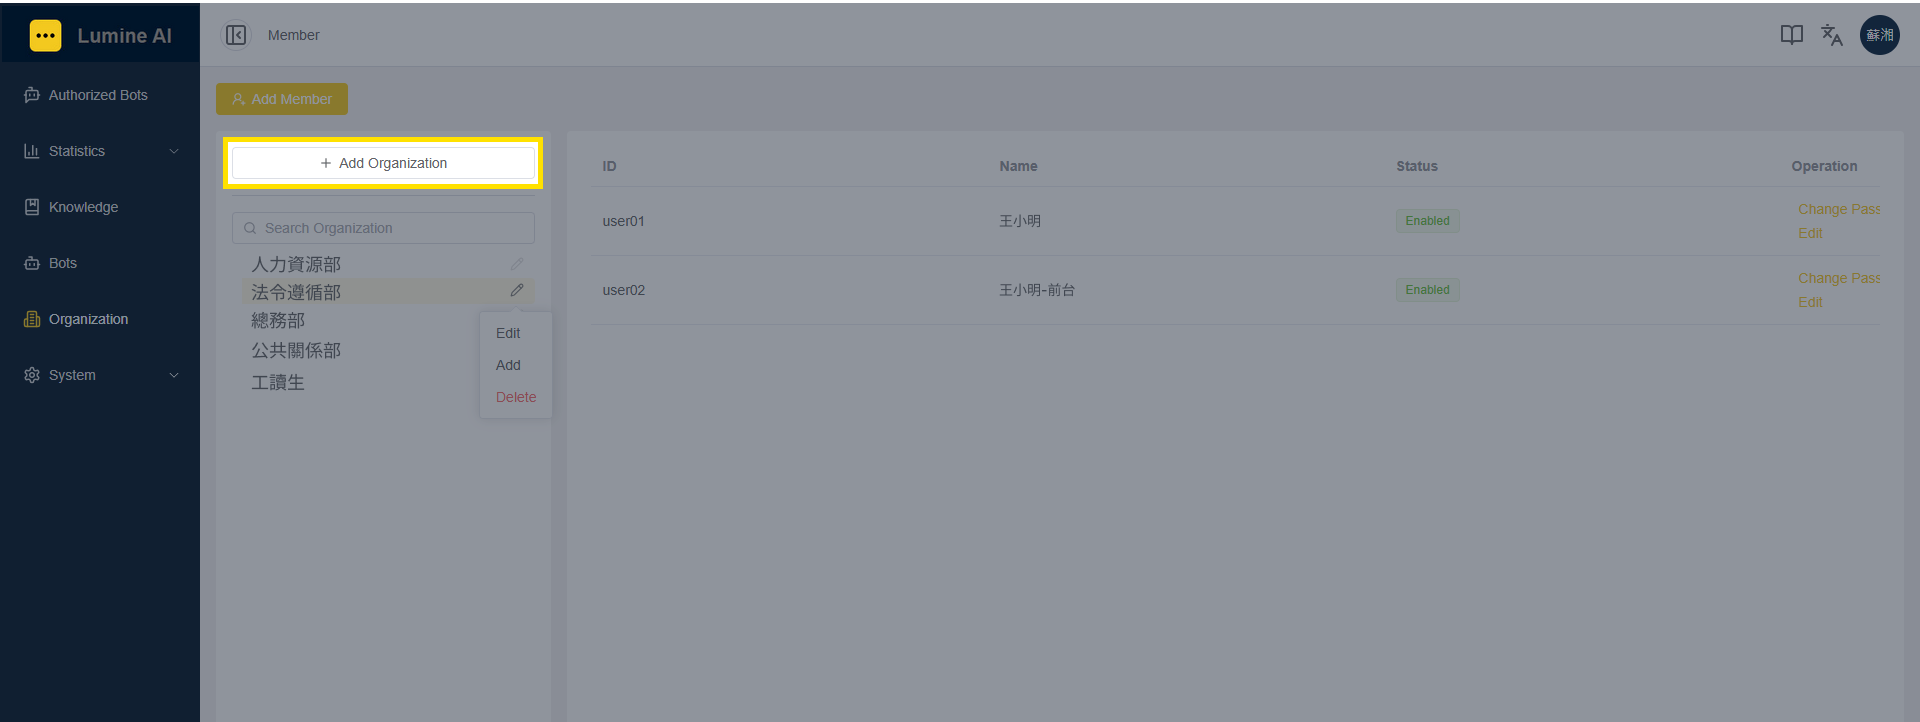
1. 點擊『新增組織』按鈕;
Click the "Add Organization" button.
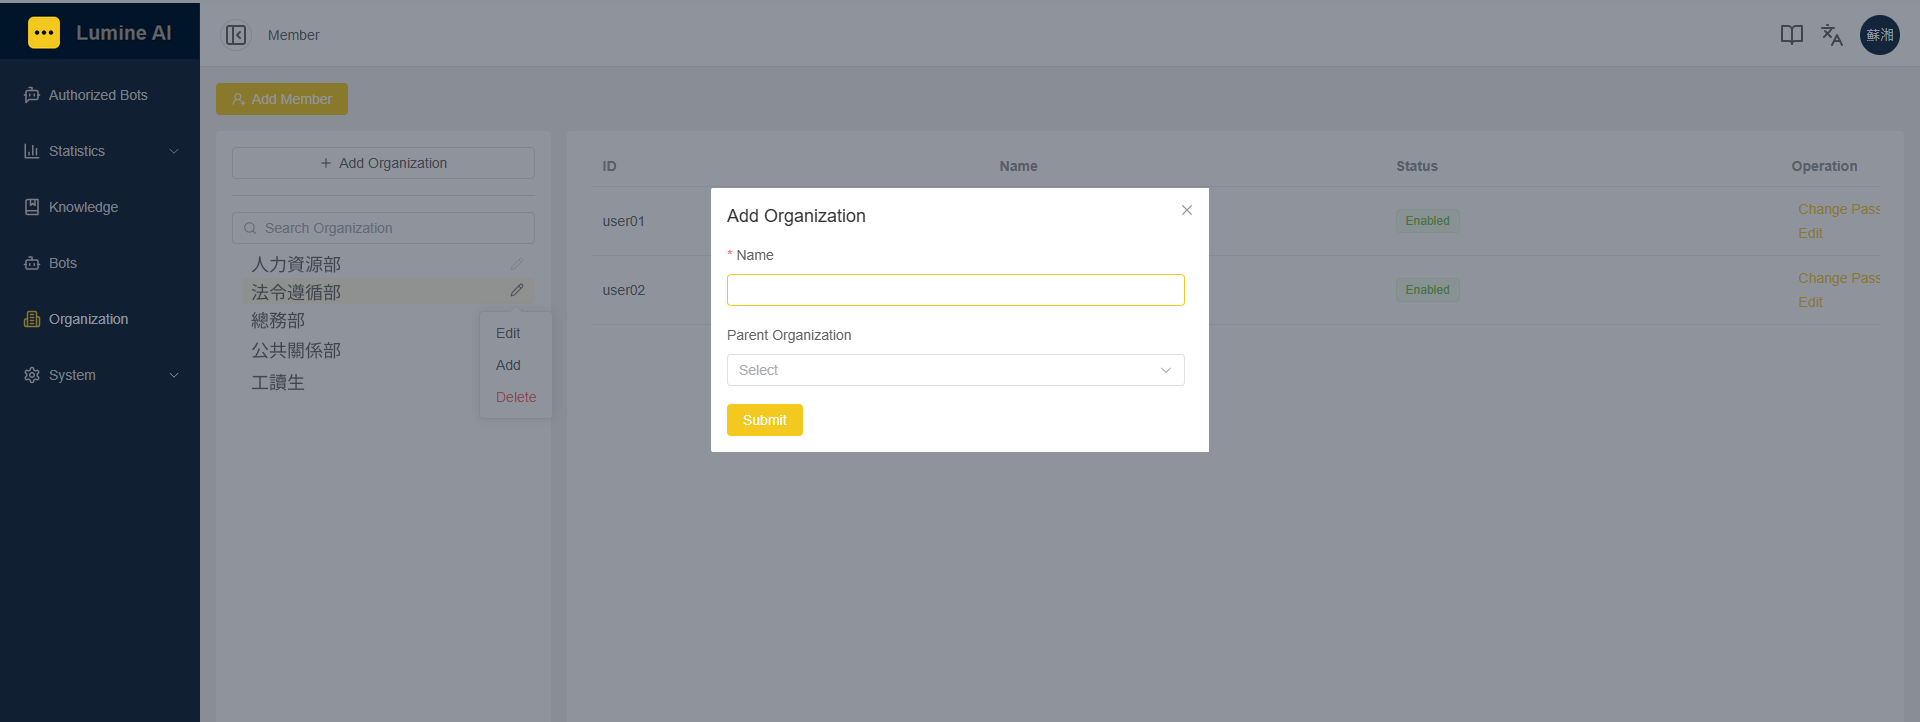
2. 輸入組織名稱與選擇隸屬組織,若無隸屬組織,可不用選擇,點擊『送出』按鈕,完成組織建立。
Enter the Name and select the Parent Organization. If there is no parent organization, you can leave it unselected. Click the “Submit” button to complete the organization creation.
C-3. 新增與編輯成員|Adding & Editing Member
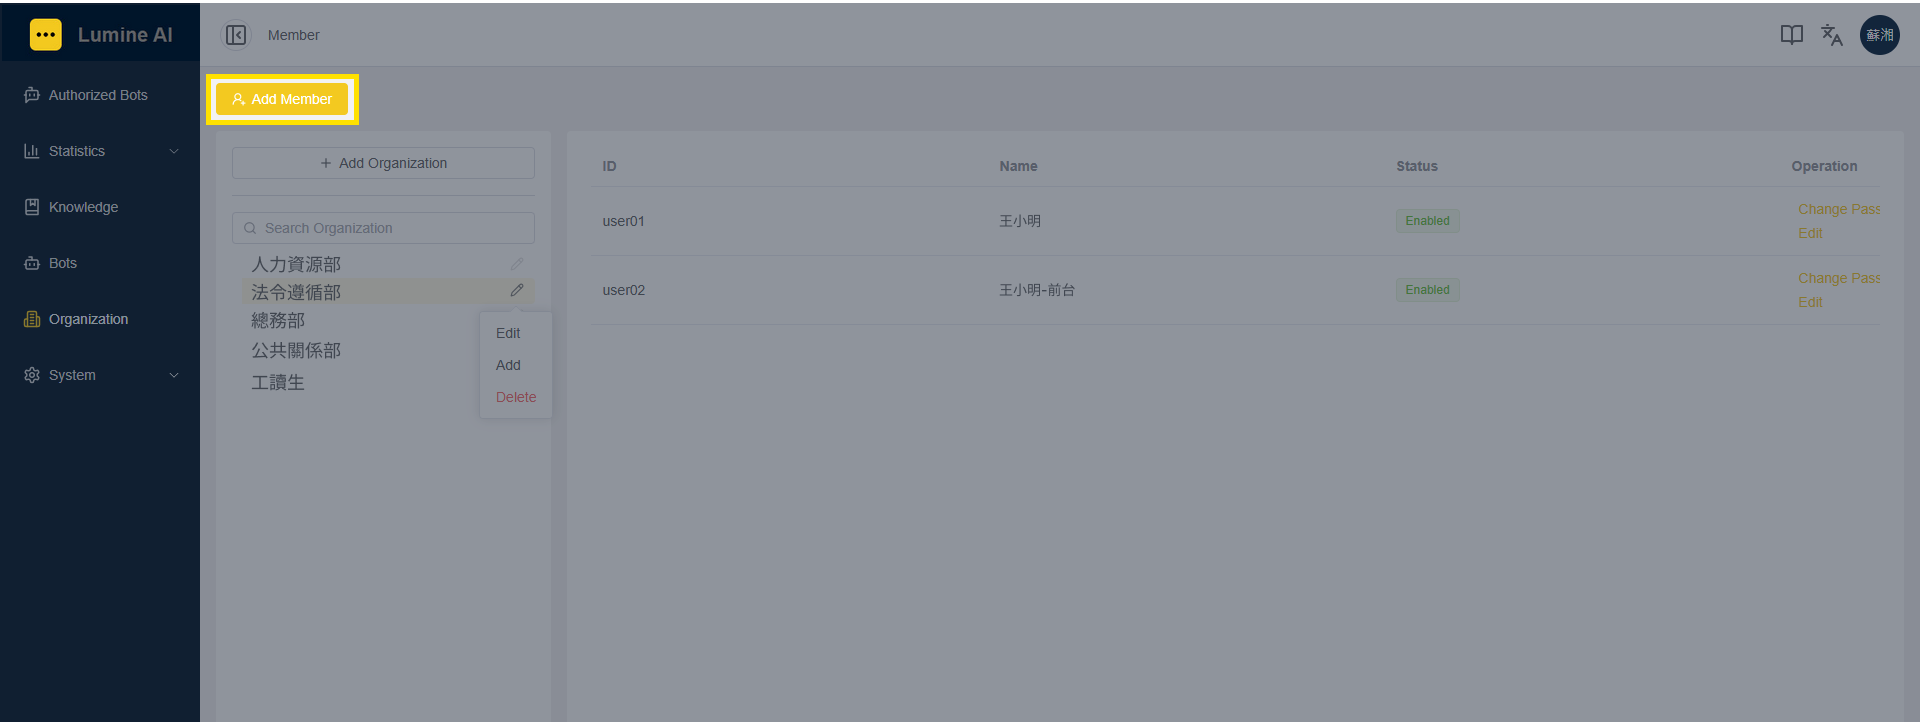
1. 點擊『新增成員』按鈕;
Click the “Add Member” button.
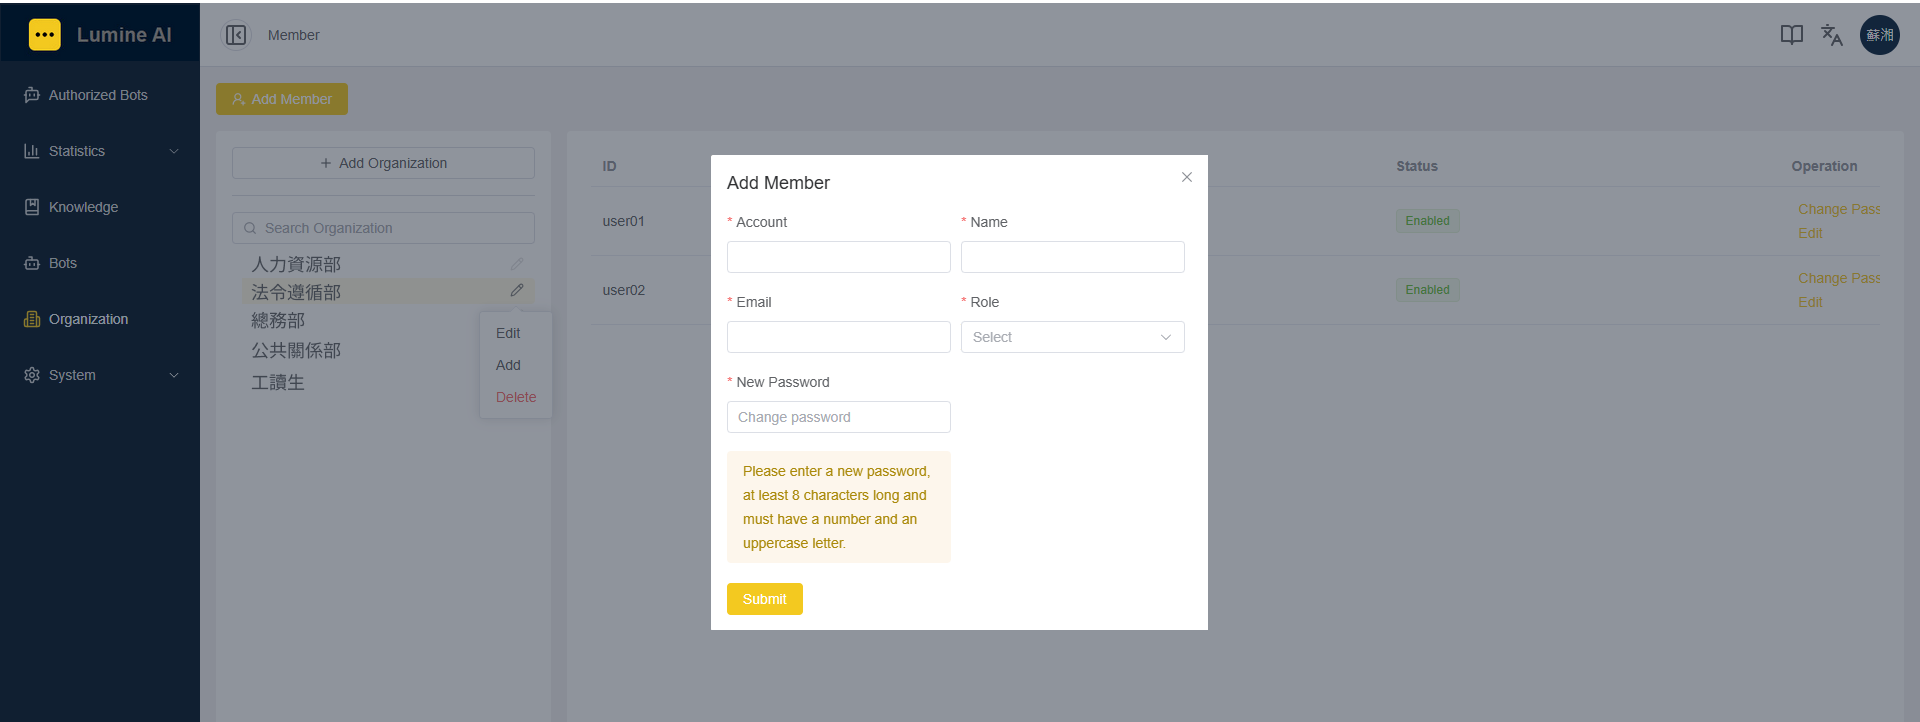
2. 輸入成員的帳號、名稱、電子郵件、密碼,並選擇角色後,點擊『送出』按鈕,完成成員建立。
Enter the member's Account, Name, Email, New Password, and select the Role. Then, click the “Submit” button to complete member creation.